Fishtail-Cable Headwarmer (Pattern)

After a long absence of patterns on this blog….

Fishtail-Cable Headwarmer

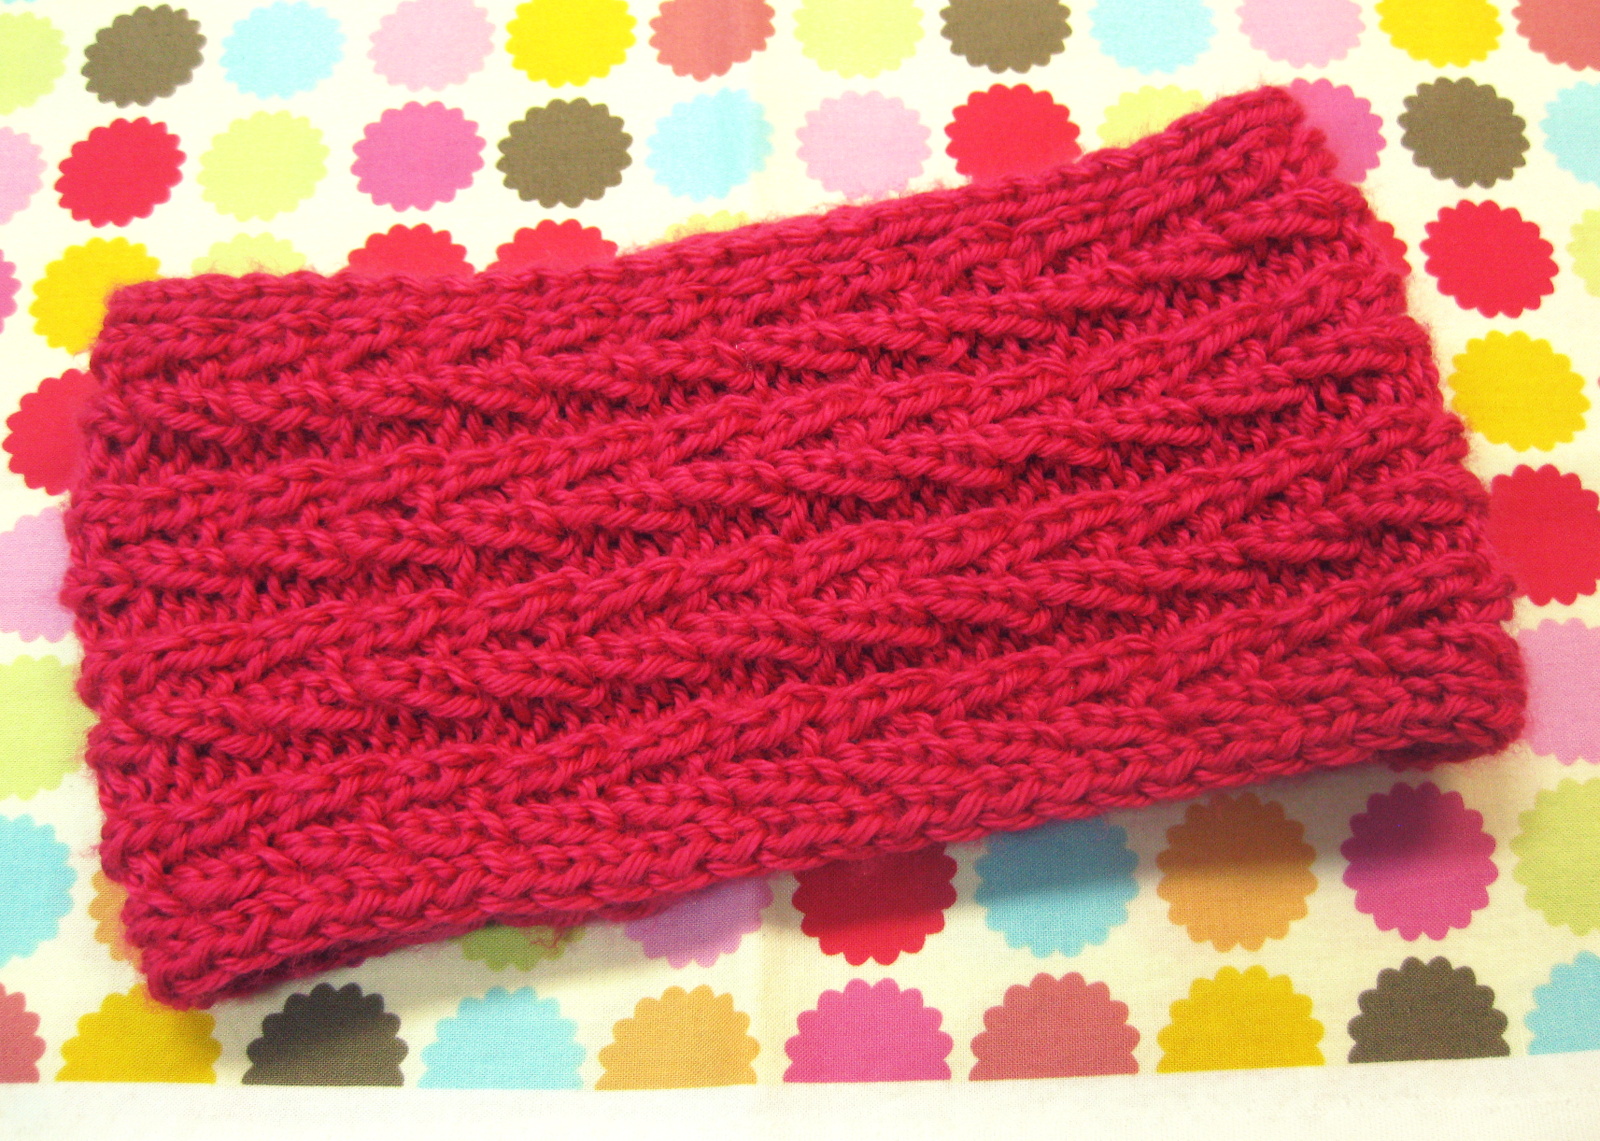
I present to you the Fishtail-Cable Headwarmer.

It’s quick.
It’s warm.
And it’s cute.

The cable pattern is a unique design that resembles a fishtail braid.

IMG_1966

I like to wear the headwarmer on my way to Krav Maga. It gives me the warmth of a hat, while still allowing me to wear my hair in a ponytail.

IMG_1870

So without further adieu….

Fishtail Cable Headwarmer

Skill Level: Intermediate
Size (one size fits most): 5″ wide and 18″ circumference (It can stretch larger)
Gauge: 5 sts and 5 rows in fishtail-cable pattern = 1″
Stitches and Abbreviations: K (knit), P (purl), C2F (cable two front), C2B(cable two back), S1kw (slip one stitch knitwise), S1pw (slip one stitch purlwise)

Note: When stated, repeat the instructions written within the asterisks (*)

-Materials-

  • 1 skein Caron Simply Soft, hot pink (or desired worsted weight yarn)
  • size 8 (5.0 mm) knitting needles
  • cable needle
  • stitch markers (a scrap of yarn will do the trick if you don’t have the real deal)

-Fishtail Cable Pattern-

Row 1: *P1, C2F, C2B, P1* repeat to end. (right side)
Row 2: *K1, P1, K2, P1, K1* repeat to end. (wrong side)
Row 3: *P1, K1, P2, K1, P1* repeat to end.
Row 4: *K1, P1, K2, P1, K1* repeat to end.

Repeat the above four rows as directed.

-Headwarmer-

  1. Cast on 28 stitches.
  2. S1kw, K1, place stitch maker, *P1, K1, P2, K1, P1* repeat till there are 2 stitches left, place stitch marker, K2. (right side)
  3. S1pw, P1, slip the stitch maker, *K1, P1, K2, P1, K1* repeat to marker, P2. (wrong side)
  4. Repeat numbers 2 and 3.
  5. S1kw, K1, work cable pattern to marker, K2.
  6. S1pw, P1, work cable pattern to marker, P2.
  7. Repeat numbers 5 and 6 till headwarmer measures 18″ long (ending on Row 1 of the cable pattern)
  8. S1pw, P1, *K1, P1, K2, P1, K1* repeat to marker, P2.
  9. Slpw, K1, *P1, K1, P2, K1, P1* repeat to marker, K2.
  10. Repeat number 8.
  11. Bind off in stitch pattern, being careful not to bind off too tightly.
  12. Sew both ends together and–ta-da!–you have your very own Fishtail-Cable Headwarmer.

PDF (Printer Friendly Version): Fishtail-Cable Headwarmer

Leave me a comment if you have any questions. Happy knitting! :)

Crochet Musical Note Tutorial

Crochet Musical Notes

After some experimentation (aka. unraveling a few failed attempts), here’s my version of a crochet musical note! :) The pattern is relatively simple, but I included some pictures for clarity on the last steps. Gauge is not necessary, since the size of the musical note is determined by the weight of the yarn used. The thicker the yarn, the bigger the note:

Fingering weight yarn = 3 1/4″ long (size of the green note in the above picture)
Sport weight yarn = 3 1/2″ long (size of the blue and orange notes)
Worsted weight yarn = 3 3/4″ long (size of the pink note)

Abbreviations: chain (ch), single crochet (sc)

What You Need:

  • about 7 yards of yarn (worsted, sport, or fingering weights)
  • size F (3.75 mm) crochet hook

Pattern:

  1. Ch 3.
  2. Join with a slip stitch to the first chain. (forming a circle)
  3. 6 sc in the center. Join with a slip stitch to first sc. (6 sc)
  4. Ch 1, 2 sc in each stitch in the round. Join with a slip stitch to the starting chain (12 sc)
  5. Slip stitch in the first 4 stitches of the next round.
  6. Ch 15. (picture below)

IMG_1894

Turn, slip stitch in the 3rd ch from hook.

IMG_1899

Work slip stitches in the next 3 chains.

IMG_1905

Slip stitch in the 4th ch from hook (skipping 3 chains).

IMG_1908

Work slip stitches in the remaining 5 chains.

IMG_1911

Work a slip stitch border around the circle portion of the note (working a slip stitch in the top loop of each stitch around the circle).

IMG_1914

Tie off and weave in ends.

IMG_1924

Turn it over, and–ta-da!–a crochet musical note!

Simple Seamless Baby Hats

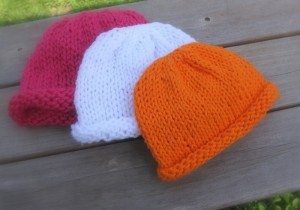
Here is another quick and easy pattern that is great for using up stash yarn. The pattern is the same for all sizes, you simply change your gauge to make sizes preemie, newborn, and baby. You can also knit these hats to go along with my other pattern Simple Seamless Baby Booties .

Skill Level: easy
Stitches Used: cast on, knit, k2t
Abbreviations: knit (k), knit two together (k2t), stitches (sts)
Sizes: preemie (newborn, baby), measures: 12″ (13″, 14″) circumference, and 5 1/2″ (6 1/2″ / 7″)  length without brim folded
Note: Make sure you check your gauge. The size of the hats are determined by the gauge you use.

Gauge:
preemie: 4 sts = 1″
newborn: 3 1/2 sts = 1″
baby: 3 sts = 1″

-Materials-

  • set of five double pointed knitting needles in size needed to obtain gauge . ( I used size 8 needles for  a preemie hat, size 9 needles for a newborn hat, and size 10 1/2 needles for a baby hat)
  • yarn suitable for gauge (I used about 34 yds of worsted weight yarn for a preemie hat, 40 yds of heavy worsted weight yarn for a newborn hat, and 47 yds of bulky weight yarn for a baby hat)

-Hat-

  • With needle size and yarn needed to obtain gauge, cast on 44 stitches. Divide stitches onto 4 double pointed needles. (11 sts per needle)

Rows 1-24: join in round, knit.  [the hat should measure  about 4 1/2″ (5 1/2″, 6 “) long]
Row 25: *k2, k2t,* repeat to end of round. (33 sts)
Row 26: knit.
Row 27: *k1, k2t,* repeat to end of round. (21 sts)
Row 28: knit.
Row 29: *k2t,* to end of round.  (11 sts)

  • Cut yarn, weave through remaining stitches 3 times, fasten off. Weave in ends. Fold up brim as desired.

Simple Seamless Baby Booties

Break out the stash yarn! These booties are super quick to knit and great for using up small amounts of leftover yarn. The pattern is the same for all sizes, you simply change your gauge to make size preemie, newborn, and baby booties.

Skill Level: easy
Stitches Used: cast on, bind off, knit, purl, k2t, ssk, sssk, k3t, picking up sitches
Abbreviations: knit (k), purl (p), knit two together (k2t), slip slip knit (ssk), slip slip slip knit (sssk), stitches (sts)
Sizes: preemie (newborn, and baby), measures 3″ (3 1/2″, 4″) long
Note:  Make sure you check your gauge. The size of the booties is determined by the gauge you use.

Gauge:
preemie: 4 stitches = 1″
newborn: 3 1/2 stitches = 1″
baby: 3 stitches = 1″

-Materials-

  • set of five double pointed knitting needles in size needed to obtain gauge . ( I used size 8 needles for  preemie booties, size 9 needles for newborn booties, and size 10 1/2 needles for baby booties)
  • yarn suitable for gauge (I used about 26 yds of worsted weight yarn for a pair of preemie booties, 28 yds of heavy worsted weight yarn for a pair of newborn booties, and 32  yds of bulky weight yarn for a pair of baby booties)
  • yarn needle

-Booties- (make 2)

  • With needle size and yarn needed to obtain gauge, cast on 5 sts.

Rows 1-18: knit (9 ridges). (see diagram #1 below)

  • With needle #2: pick up and knit 9 sts along the  left edge of the garter stitch strip. (see diagram #2 below)
    With needle #3: pick up and knit 5 sts along the bottom. (see diagram #3 below)
    With needle #4: pick up and knit 9 sts along the right edge. (total of 28 stitches on needles)  (see diagram #4 below)

Rows 1-4: join in round, knit.
(directions are given for each needle on rows 5-7)
Row 5:
Needle #1: knit 5.
Needle #2: knit till there are 2 sts left on the needle, slip these last 2 sts onto needle #3.
Needle #3: sssk, k3, (1 un-worked st left on needle #3) slip 2 sts from needle #4 onto needle #3 ( 3 un-worked sts left on needle #3) k3t.
Needle #4: knit to end of needle. (total of 24 sts on needles)
Row 6: Same as Row 5. (total of 20 sts on needles)
Row 7:
Needle #1: ssk, k1, k2t.  (Note: for a wider leg opening skip the decreases on this needle and simply knit 5.)
Needle #2: knit till there are 2 sts left on the needle, slip these last 2 sts onto needle #3. (3 sts)
Needle #3:  sssk, k3, (1 un-worked st left on needle #3) slip 2 sts from needle #4 onto needle #3 ( 3 un-worked sts left on needle #3) k3t. (5 sts)
Needle #4: knit to end of needle. (total of 14 sts on needles)
Row 8: knit.
Rows 9-11: k1, p1, ribbing. (Note: to make the leg opening larger, don’t work the k1, p1, ribbing and just do garter stitch in the round for rows 9-16)
Rows 12-16: knit (or work any stitch pattern desired).

  • Bind off loosely and weave in ends. Fold cuff over and sew in place if desired.

Garter Stitch Baby Hat

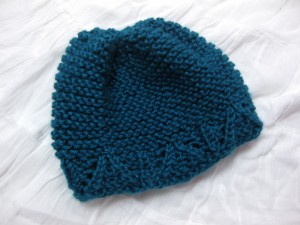
(Shown above in size baby)

Skill Level: intermediate
Stitches Used: cast on, knit, purl, k2t, ssk, yo
Abbreviations: knit (k), purl (p), yarn over (yo), knit two together (k2t), slip slip knit (ssk), stitches (sts)
Sizes: preemie (baby), 11 1/4″ (13 1/2″) circumference and 5″ (6″) length
Gauge: in garter stitch in the round, 4 sts and 6 rows = 1″ by 1″

-Materials-

  • 1 skein Red Heart Soft Yarn, teal – 256 yds (100% acrylic)
  • set of size 8 double pointed knitting  needles
  • set of size 9 double pointed knitting needles
  • yarn needle

-Hat-

  1. With size 8 needles, cast on 45 (54) stitches, divide onto 3 or 4 double pointed needles.
  2. Join in round, and purl 1 row.
  3. Change to size 9 needles, Knit 1 row.
  4. *P2, k2t, yo, k1, yo, ssk, p2,* repeat to end.
  5. *P2, k1, p1, k1, p1, k1, p2,* repeat to end.
  6. *P1, k2t, yo, p1, k1, p1, yo, ssk, p1,* repeat to end.
  7. *P1, k1, p2, k1, p2, k1, p1,* repeat to end.
  8. *k2t, yo, p2, k1, p2, yo, ssk,* repeat to end.
  9. Change to size 8 needles, *k1, p3, k1, p3, k1,* repeat to end.
  10. Knit 1 row.
  11. Purl 1 row.
  12. Repeat numbers 10 & 11 till hat measures 4 1/2″ (5 1/2″), or until hat measures 1/2″ shorter than desired length. (ending on a purl row)
  13. *K1, k2t,* repeat to end. [27 (36) stitches]
  14. Purl 1 row.
  15. *K2t,* repeat to end. [9 (18) stitches]
  16. Purl 1 row.
  17. Cut yarn and weave through remaining stitches 3 times. Fasten off, and weave in ends.

Basket Weave Dishcloth

This quick scrubber pattern is great for knitting up leftover skeins of cotton yarn.
Skill Level: easy
Stitches Used: cast on, knit, purl, bind off
Abbreviations: knit (k), purl (p)
Measures: 6 ½” wide and 7 ½” long
Gauge: in basket weave stitch, 15 stitches and 23 rows = 4” by 4”

-Materials-

  • 1 skein Pisgah Yarn & Dyeing Co. inc. Peaches & Creme – 122 yds (100% cotton)
  • size 8 knitting needles
  • yarn needle
-Pattern-
  • Cast on 25 stitches (to make a larger dishcloth, cast on a number that is a multiple of ten then add 5)

Rows 1, 3, 5, 7: *K5, p5,* till there are 5 stitches left, k5.
Rows 2, 4, 6, 8: *P5, k5,* till there are 5 stitches left, p5.
Rows 9, 11, 13, 15: *P5, k5,* till there are 5 stitches left, p5.
Rows 10, 12, 14, 16: *K5, p5,* till there are 5 stitches left, k5.

  • Repeat rows 1-16 till scrubby measures 7 1/2″ long , ending on row 8 of pattern (or desired length).
  • Bind off and weave in ends.

Little Kimono Slippers

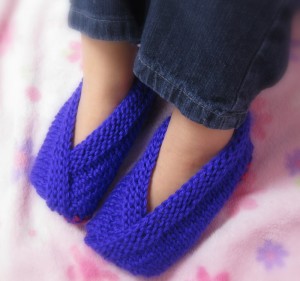
(shown above in size medium)

Skill Level: intermediate
Stitches Used: cast on, bind off, knit, purl, k3t, sssk
Abbreviations: knit (k), purl (p), knit three together (k3t), slip, slip, slip knit (sssk), place marker (pm)
Measures: girls’ sizes small (medium, large): 6 ½” (7 ½”, 8 ½”) long
Gauge: in stockinette stitches, 4 stitches and 5 rows = 1” by 1”

-Materials-

  • 1 skein Caron Simply Soft, iris – 315 yds (10% acrylic)
  • 1 skein Caron Simply Soft, rubine red – 315 yds (100% acrylic)
  • size 8 circular knitting needle (the circular needle is used for the stripe pattern)
  • yarn needle

-Slippers- (make 2)

  1. With iris, cast on 10 (12, 14)stitches.
  2. With rubine red, knit 1 row.
  3. Slide stitches to other end of needle, pick up iris, knit 1 row. (right side)
  4. Turn, pick up rubine red, purl 1 row. (wrong side)
  5. Slide stitches to other end of needle, pick up iris, purl 1 row, turn.
  6. Repeat numbers 2-5 till piece measures 5 ½” ( 6 ½”, 7 ½”), cut rubine red. (ending in a iris purl row)
  7. At beginning of row, cast on 20 (24, 28) stitches, knit to end. [30 (36, 42) stitches]
  8. At beginning of row, cast on 20 (24, 28) stitches, purl 24 (29, 34) stitches, pm, p2, pm, purl to end. [ 50 (60, 70) stitches]
  9. Work stockinette stitch for 6 (8, 10) more rows. (ending with a purl row)
  10. Knit 2 rows.
  11. Knit to 3 stitches before marker, sssk, k2, k3t, knit to end.
  12. Knit 1 row.
  13. Repeat numbers 11 and 12. [42 (52, 62) stitches]
  14. Bind off and weave in ends.
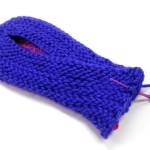
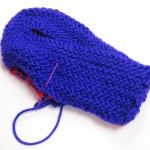
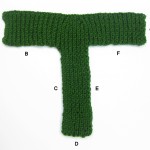
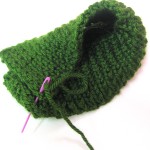
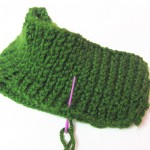
  • Sew slippers according to the diagram and additional pictures below. (click on pictures to enlarge) Reverse sewing for the opposite slipper.
  1. Sew G to D.
  2. Sew A over G & D.
  3. Sew B to C.
  4. Sew F to E

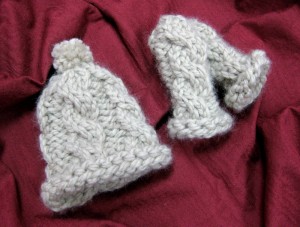
Thick and Quick Hat and Mittens

(shown above in size preemie)

Skill Level: easy
Stitches Used: cast on, knit, purl, k2t, ssk, p2t, cf4
Abbreviations: knit (k), purl (p),knit two together (k2t), slip slip knit (ssk), purl two together (p2t), cable front four (cf4)
Measures: pattern comes in sizes preemie (newborn, baby)
hat: approximately 10 (12, 14) circumference and 3” (6 ¼”, 7 ½”) length
mittens: approximately 4 ½” (7”, 7”) circumference, and 4 ½” (5 ¾”, 7”) length
Gauge: In cable pattern, 10 stitches and 12 rows = 4” by 4”

-Materials-

  • 1 skein Lion Brand Wool-Ease Thick and Quick, linen – 106 yds (80% acrylic) (20% wool)
  • set of four 10 ½ double pointed needles
  • cable needle
  • yarn needle

-Cable Pattern- (working in a round)

Rows 1 -3: *K4, p2,* to end.
Row 4: *CF4, p2,* to end.

Repeat these 4 rows as directed in the pattern.

-Hat-

  1. cast on 24 (30, 36) stitches.
  2. Divide stitches onto 3 needles, join in round, knit 3 rows.
  3. Repeat cable pattern 3 (4, 5) times.
  4. *K4, p2t,* repeat to end. [20 (25, 30) stitches]
  5. *K4, p1,* repeat to end.
  6. *Ssk, k2t, p1,* repeat to end. [12 (15, 18) stitches]
  7. Cut yarn, pull through remaining stitches 3 times.
  8. Attach pom-pom to top on hat.

-Mittens- (make 2)

  1. cast on 12 (18, 18) stitches.
  2. Divide stitches onto 3 needles, join in round, knit 3 rows.
  3. Repeat cable pattern 3 (4, 5) times.
  4. *K4, p2t,* to end. [10 (15, 15) stitches]
  5. *K4, p1,* to end.
  6. *Ssk, k2t, p1,* to end. [6 (9, 9) stitches]
  7. Cut yarn, pull through remaining stitches 3 times.

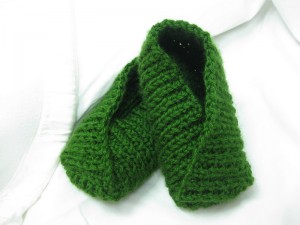
Kimono Slippers

(size small featured in above picture)

Skill Level: intermediate
Stitches used: cast on, bind off, knit, purl, sssk, k3t
Abbreviations: slip slip slip knit (sssk), knit three together (k3t), knit (k), purl (p)
Measures: 8” (9”, 10”) long, women’ sizes small (medium,  large)
Gauge: in k1, p1 ribbing, 6 stitches untstretched (3 sts fully stretched) and 5 rows = 1”

-Materials-

  • 1 skein Red Heart Soft Yarn Solid, grass green – 256 yds (100% acrylic)
  • size 8 knitting needles
  • yarn needle

-Pattern- (make 2)

  1. Cast on 15 ( 17, 19) stitches, *p1, k1,* till there is one stitch left, p1. (right side)
  2. *K1, p1,* till there is one stitch left, k1. (wrong side)
  3. Continue in set ribbing pattern till piece measures 8” (9”, 10”). (ending on a wrong side row)
  4. At beginning of row, cast on 27 (31, 35) stitches, *k1, p1,* to end. [42 (48, 54) stitches]
  5. At beginning of row, cast on 27 (31, 35) stitches, *p1, k1,* till 1 stitch left, p1. [69 (79, 89) stitches]
  6. *K1, p1,* till there is one stitch left, k1. (right side)
  7. *P1, k1,* till there is one stitch left, p1. (wrong side)
  8. Repeat numbers six and seven 4 (5, 6) times. (ending on a wrong side row)
  9. *K1, p1,* for 28 (32, 36) stitches, sssk, work ribbing for 7 (9, 11) stitches,  k3t, *p1, k1,* to end. [65 (75, 85) stitches] (right side)
  10. *P1, k1,* till there is one stitch left, p1. (wrong side)
  11. *K1, p1,* for 28 (32, 36) stitches, sssk, work ribbing for 3 (5, 7) stitches, k3t, *p1, k1* to end. [61 (71, 81) stitches]
  12. Repeat number 10.
  13. Bind off in ribbing stitch.
  • Sew slippers according to the diagram and additional pictures below. (click on pictures to enlarge) Reverse sewing for the opposite slipper.
  1. Sew G to D.
  2. Sew A over G & D.
  3. Sew B to C.
  4. Sew F to E.

Basic Charity Hats

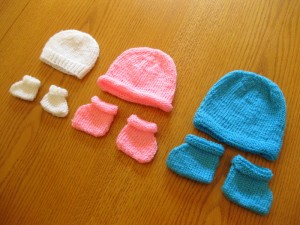
This simple pattern comes in sizes preemie, newborn, and baby. It also includes adjustments for 3 different gauges making it a perfect pattern for knitting charity projects with leftover  stash yarn.   (The picture above shows the hats using the 5 stitch gauge)

Skill Level: easy
Stitches used: cast on, knit, k2t, k3t, bind off
Abbreviations: knit (k), knit two together (k2t), knit three together,
Measures: sizes preemie, (newborn, baby)
hat: approximately  11” (12”, 13”) circumference and 4” (5’, 6”) length
booties:  approximately 2″ (3″, 4″) wide
Notes: the adjustments for each size will be listed in parenthesis in this order, preemie (newborn, baby)

-Materials-

  • knitting needle size of your choice
  • yarn of your choice
  • yarn needle
  • stitch markers

-Hat-
Work a swatch first to determine what gauge you are knitting in. Listed below are the numbers of stitches you need to cast on for your gauge.

  • For 3 stitches per inch gauge: cast on 32 (36, 40) stitches, continue with pattern.
  • For 4 stitches per inch gauge: cast on 44 (48, 52) stitches, continue with pattern.
  • For 5 stitches per inch gauge: cast on 54 (60, 66) stitches, continue with pattern.

1. Place marker and join in round, work 1” of edging in stitch of your choice. (such as garter stitch, ribbing, seed stitch…)
2. Knit for 2” (3”, 4”).

  • For 3 stitches per inch gauge: *k2, k2t* to end of row. Knit 1 row. *K1, k2t* to end of row. Knit 1 row. K2t to end of row. Cut yarn and pull through remaining stitches. Fasten off and weave in ends.
  • For 4 stitches per inch gauge: *k2, k2t* to end. Knit 2 rows. *K1, k2t* to end. Knit 2 rows. K2t to end. Cut yarn and pull through remaining stitches. Fasten off and weave in ends.
  • For 5 stitches per inch gauge: *k4, k2t* to end. Knit 1 row. *K3, k2t*, to end. Knit 1 row. *K2, k2t*, to end. Knit 1 row. *K1, k2t*, to end. Knit 1 row.  K2t to end. Cut yarn and pull through remaining stitches. Fasten off and weave in ends.

-Booties- (make 2)
Work a swatch first to determine what gauge you are knitting in. Listed below are the numbers of stitches you need to cast on for your gauge.

  • For 3 stitches per inch gauge: cast on 16 (20, 24) stitches, continue with pattern.
  • For 4 stitches per inch gauge: cast on 22 (26, 30) stitches, continue with pattern.
  • For 5 stitches per inch gauge: cast on 26 (32, 38) stitches, continue with pattern.

1. Place marker at begging of row and join in round, knit half of the stitches , place marker, and knit to end.
2. Knit till bootie measures 1” (1 1/2”, 2”)
3. Knit to 3 stitches before middle marker, k3t, k3t, knit to end.
4. Knit 1 row.
5. Knit to 2 stitches before middle marker, k2t, k2t, knit to end.

  • For 4 stitches per inch gauge: knit 1 row. Repeat  number 5.
  • For 5 stitches per inch gauge: knit 1 row. Repeat number 3.

6. Knit till bootie measures 2” (2 1/2”, 3”).
7. Work 1” of edging stitch of your choice. (such as garter stitch, ribbing, seed stitch…)
8. Bind off. Sew bottom of bootie together, pull tightly and secure. Weave in ends.